In this article, we will discuss the best way to clean a keyboard. It is no wonder that keyboards become dirty after periods of extended use. Keyboards tend to become dirty easily if users commonly eat or smoke near the computer. The problem with the dirty keyboard is that typing becomes difficult. You won’t prefer typing on a sticky, dusty or grimy keyboard. So, read this article to easily clean a keyboard.
Steps to Clean a Keyboard:
1.) Unplug the Keyboard from the Computer
Do not attempt to clean a keyboard while it is connected to your computer. Unplug your keyboard from the computer you start the cleaning process to avoid getting any shock. The best way is to turn off your computer then unplug keyboard to prevent accidental stretching of wire. While cleaning the keyboard try to cover the plug with a plastic bag it doesn’t get wet.
To get rid of any loose debris, such as cookie crumbs just turn you keyboard upside down. This step is necessary before you apply any other technique.
2.) Gather Cleaning Supplies
Cleaning a keyboard doesn’t take a lot of materials and a long time to do, in most of the cases. Here is the list of cleaning supplies you will need:
- A handkerchief, old cotton cloth or other cloth that will not shed fuzz.
- Cotton swabs, i.e. Q-tips
- A screwdriver or knife for prying off the keys
- A bottle of electronics cleaner or rubbing alcohol
- A bottle of dish soap (optional)
3.) Clean Betwixt the Keys
There are two major ways to clean in between the keys of the keyboard. The faster and effective way are to use the can of compressed air by aiming directly it in the cracks and blowing out the dust. You should careful with the compressed air can as it contains potentially harmful chemicals. Use this method in a well-ventilated area.
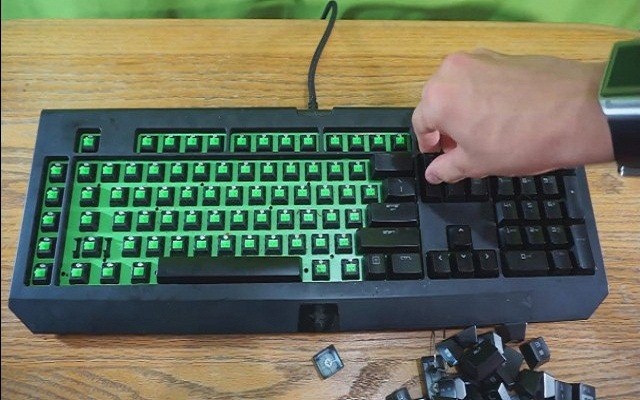
The second way to clean a keyboard is by removing the keys and then wiping out the area between and beneath keys with the rubbing alcohol or other cleaning solution. You should gently pry them off with any flat head screwdriver or knife. Be careful while removing the keys, take out only top cover off the key and not to remove the base. Once you damage the base it will become impossible to put the key back on when you’re finished. You should remove only the letter and number keys unless you are a computer hardware expert. Take a picture of the keyboard before removing space bar as it has a complex attachment with the base of the keyboard.
4.) Clean the Keys
After taking keys off, place them in a bowl of lukewarm water and add a few drops of dish soap to clean them with some light scrubbing. If you still have few keys attached to the board then you can use the cloth to clean them. Soak a cotton cloth in the rubbing alcohol and clean the keys. To clean any tight areas you should use the cotton swabs.
5.) Leave the keyboard to dry
Once you finished with the Keys, use a damp cloth to wipe off the surface of the keyboard. You do not need to dry your keyboard if you have used the electronics cleaner or rubbing alcohol. Although, if you have used soap and water on the keys then you need to dry the keyboard for a couple of hours.
6.) Reassemble the Board and Plug it Back In
Check for the keyboard is completely dry before plugging it to the computer. Once you are sure that the keyboard is completely dry then plug it in the computer.

