In this article, we will discuss the best way to install a toilet. If you may thinking that installing a new toilet can only done by the professional then you will be happy to know that is a lot easier than you may think. Numerous homeowners choose to install their toilet without the help of a handyman or plumber. If you have decided to install your toilet on your own then this article will teach the best way to do this.
Best Way to Install a Toilet:
1.) Disconnect the Supply Line
Turn off water supply at the shut off and flush the toilet to remove the water from the tank and bowl. You will still find little water trapped in the bowl. To remove water in the bowl you can use a force-cup plunger to force it down the drain line. Finally, remove all the remaining water from the tank using a sponge and a bucket.
2.) Removing the Old Toilet
To remove your old toilet, you need to pop off the trim caps at the base. Then, loosen and remove all the nuts and washers on the closet bolts getting the bowl to the floor. You might not be able to remove nuts if they are rusted, in such case you may need to cut them off.
Note: Do not forget to disconnect the tank from the bowl before removing the bowl. You should lift the two pieces separately.
Once you have removed all the nuts it’s time to gently rock the toilet back and forth until it gets free from the base. After removing the toilet you should fill sewage hole to prevent tools from falling into the hole.
3.) Place the New Wax Ring
You should sit the toilet bowl on its side to protect the floor and the toilet. Consider attaching the new replacement wax ring to the bottom of the bowl. The major benefit of this method is that you can be sure that the ring is in the properly positioned when placing the toilet over the flange.
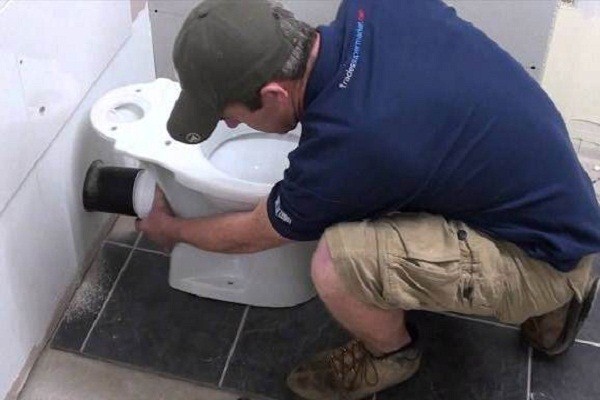
4.) Place the Toilet Bowl on the Flange
Now, simply place the toilet bowl onto the flange. Properly align the bolt holes of the bowl with the bolts. If it works then you can easily hold the bowl by the inside rim and then you do not need to get a better grip and more control as you lower it.
Tip: Be careful not to move the toilet after setting the wax seal on the flange. Any movement or tilt can be result into the breakage of the seal, which may result in future leaks.
5.) Secure the Toilet
Set the installed toilet onto the flange assembly and make sure that the closet bolts distended from the floor line up along with the holes in the base. Now, lightly press the toilet in its place to form a good seal with the wax ring. Place few washers and a nut on each bolt. Carefully, secure the nuts with a small wrench and check that you do not over tighten them. If the bolts exceed too far over the top of washers and nuts then simply cut off the excess with a hacksaw. Now, pop the trim caps in the place to cover the ends of the bolts. Use a mounting bolt to secure the new seat and lid to the bowl. You should use a slip-joint pliers to reconnect the water supply line to the bottom of the tank.
6.) Attach the Tank to the Toilet Bowl
If tank is not already attached then you need to install the “tank to bowl” gasket on to the base of the flush valve and then insert the tank bolts. Align the tank onto the bowl along with the shank of the bolts with the holes. Fasten the tank to the bowl by tightening each tank bolt properly until the tank comes in contact with bowl.
Reconnect the supply line to the valve coming out of the wall or floor. It is recommended that you should replace the old supply line with a new one.
It is very important that you check for the leakage of the toilet. After installing the toilet you should not turn on water supply at full speed instead turn it on slowly to check for leakage. If you find any leakage problem, immediately shut off the valve and allow the tank to fill.
7.) Choose a Toilet Seat
You should know that most of the two-piece toilets do not come with a seat. That’s why they must be purchased separately. You should choose toilet seat according to the toilet model you have chosen. Properly secure the new seat according to the manufacturer’s instructions. It is quite important to follow the guidelines as there are different types of seats and lids.


