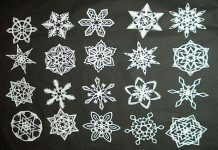
After writing how to make a cootie catcher?, we will discuss the best way to make a paper snowflakes. Every one love to decorate their Christmas tree with some paper snowflakes. It is really exciting if you know how to make paper snowflakes as it amazes not only you but your friends also. If you think that it is quite difficult to make paper snowflakes then just follow this article. We are discussing the easiest way to make a little DIY paper snowflake garlands.
Things You Will Need:
- White paper (or any color)
- Scissors
- White thread
- Sellotape
- Pencil
Steps to Make Paper Snowflakes:
Step 1:
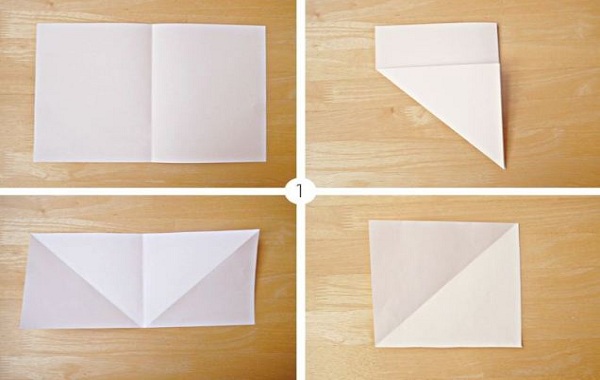
Take a white of the colored square paper. if you have printing paper or A4 then you can make it square by the folding piece of paper into half. Then, fold one of the corners in order to meet the middle, and after that trim off the excess at the top. Now, unfold the paper and simply cut down the line in the middle. You will be left with two large squares. You can simply refer the image above.
Step 2:
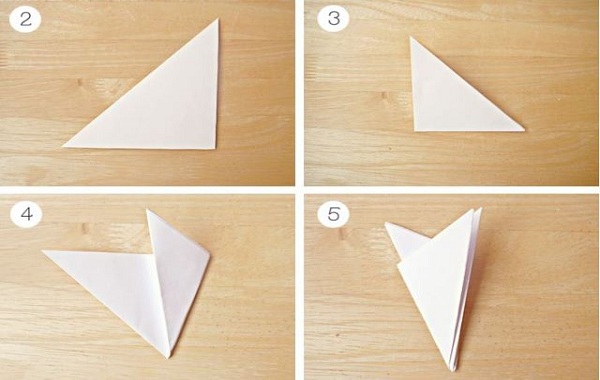
As shown in the image above, take the square piece and fold it in half diagonally to form a triangle. Then, again fold it in half to make a smaller triangle. Now, there comes the slightly more complicated part but you can do it by keeping close eye. Fold the right side of the triangle towards the middle and just past the center of the triangle. Now, take the left side of the triangle and fold it towards the center point followed by the top of the right side, so both the edges line up. You should do it as neatly as possible to make the symmetrical snowflakes.
Step 3:
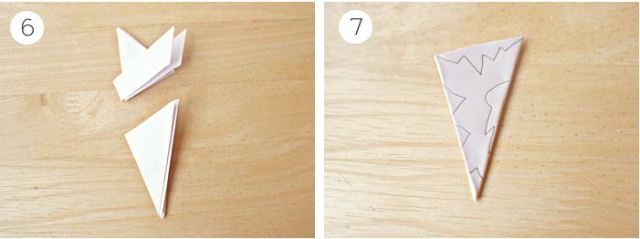
Snip off the top of the triangle using scissors at an angle but make sure you cut past the lowest point of either sides of the triangle. Now, it’s time to create your own pattern whichever you like. We recommend you to do it by freehand and cut out random triangles, lines, hexagon, and circles. Those, who wants fancy drawing can make pattern prior by just using a pencil to mark out where to cut.
Step 4:
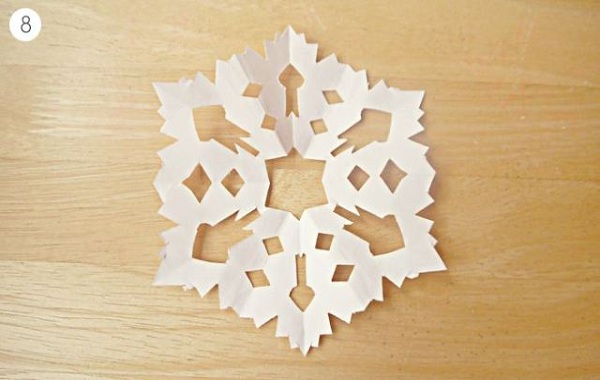
After cutting down the all the bits you want, simply unfold the paper and you will be left with a beautiful snowflake shape.
Step 5:
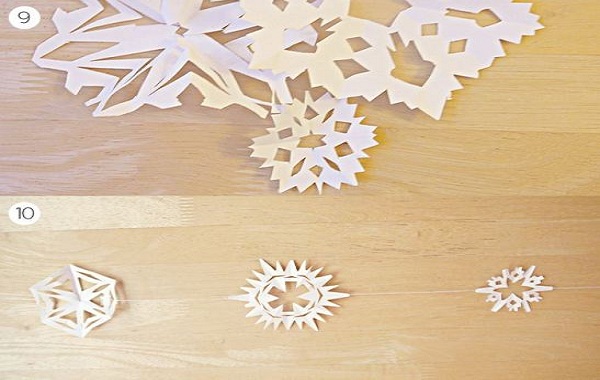
To make snowflakes garland you need to repeat the steps with a couple of different sizes of squares to make a whole bunch of unique snowflakes. Once you are done, you simply need to take a thread according to required measured length. The length of the thread will depend on upon where you want to hang the snowflakes like window frames, mirror, or wall. Tie your snowflakes with the thread on a table making sure they spread out equally. Use a sellotape to bind the thread to the back of the snowflake. Keep on doing this until you have attached all the snowflakes.
Step 6:
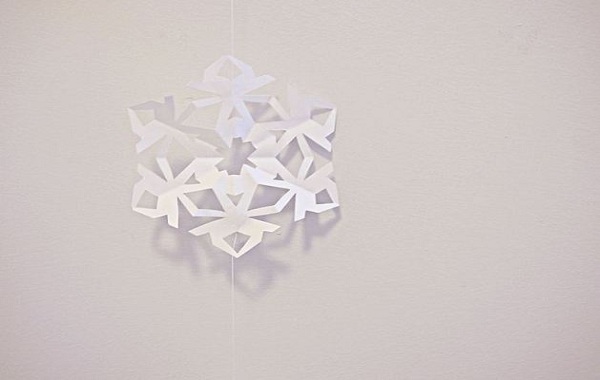
You are done making snowflakes with ease. Once you have got the basic technique of making snowflakes then you will slowly get mastered. Vertically hanging garlands look quite fascinating but make sure their bottom is free to move as it looks awesome.


