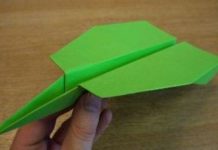
After writing how to make a cootie catcher?, we will discuss different ways to make paper airplanes. One doesn’t need to be an engineer to make an airplane. All you need to have is some fine paper sheet and this article. Here we will guide you some of the best ways to make paper airplanes. These are easy, simple and really fun to make. Here we will show you three different types of paper airplanes. So let’s fly them!

1.) Method 1 to Make Paper Airplanes – Classic Airplane
Steps to Make Paper Airplanes:
Basic Steps:
- Bring a sheet of paper. You can take a standard letter size paper or any other similar paper.
- Fold the paper in half. Make sure you fold it lengthwise only.
- Now, fold the top corners of the same side and bring them to the center crease. Try to make the fold crisp and nice. You can do this using your nail or scale as well.
- After that, you need to fold the angled edge into the middle along the crease. Take these new angled sides and fold them both in to make them meet at the middle fold.
- In this step fold the paper in half so that it hides all of the other folds inside.
- Finally, just fold down the top two flaps to create the wings. Ensure that these folds are crisp and nice. For this use a hard edge such as nail or a scale.
2.) Method 2 to Make Paper Airplanes – Advanced Airplane
Steps for Advanced Airplane:

Steps to Make Paper Airplanes:
- Take a printer paper (generally it is 8.5×11”). Fold the paper in half and make a crease. Make sure you bring the two longer sides together to make the edges touch.
- Now, open up the paper again and fold the two top corners of the same side and make them meet at the center. Ensure that they meet at the middle crease.
- Now, fold the point down to the crease that was made in the earlier step. This will make the flaps get tucked under the fold. Try to make this fold as crisp as possible. Now, you will notice that the paper is looking like a back of an envelope.
- Now, you have got new corners (made in the earlier step) on the sheet. Fold the new corners down to the middle crease. This will make the points about 2/3 of the way down the middle crease of the flap.
- After that, fold up the middle point which got covered in the last step. This will secures the flaps against the middle crease.
- Now, in this step, fold the paper in half along the original middle fold. Make sure that all the folds created in the last steps are facing outwards. And, the new small triangular fold is now alongside which will later be the bottom part of the paper airplane.
- Now to create wings, fold both side flaps down to the bottom of the main middle fold line. This will make the long edge of the wings aligned perfectly with the bottom of the paper airplane.
- Now, unfold the wings of your plane a bit. This will make them perpendicular to the body of the plane. It will create a flat surface next to each other.
- Your paper airplane is ready! Toss it up to see how your paper airplane floats through the air.
- Make a couple of more airplanes with your friends and see whose plane goes the farthest.
3.) Method 3 to Make Paper Airplanes – Delta Wing Plane

Steps to Make Paper Airplanes:
- Take a paper which is a letter size (8.5 inches by 11 inches) or take A4 sheet.
- You need to Fold mark a center on the sheet. For this, simply fold and unfold the sheet vertically and horizontally as well. This will give you a middle point on the paper. Make sure you do it as precisely as you can.
- Now, you need to fold the top two corners down and bring them at the vertical crease. This will give a flat horizontal line at the top of the sheet.
- Now you need to fold the top of the sheet down to the middle of the paper. Make sure it lines up precisely with the horizontal crease made on the paper.
- Then, you need to fold down the top corners of the same side to make them meet at the vertical crease.
- You need to fold the paper in half lengthways through the vertical crease. You will get a triangle shape.
- Now, simply draw a 3/4 inch line from the middle fold.
- Finally you just need to fold each of the wings down along the line you drew in the last step. Ensure the body of the airplane is vertical. And, also make sure that the wings are horizontal at a 90° angle.
- Your paper airplane is ready.
Tips to Make Paper Airplanes:
Other Useful Tips:
- Try to make paper airplanes thinner to move them faster.
- You can use newspaper to make paper airplanes. Newspaper makes lighter and more aerodynamic planes.
- Try different ways to throw airplane. Try different speeds, angles, and heights.
- Don’t throw it in front of someone’s face as the pointed corners can hurt someone, especially eyes.
- You can use ruler, your fingernail, or a hard card to make the creases nice and crisp.
- Experiment with the flaps by folding them at different angles. This might make your plane do stunts and funny things.
- Try to make folds as tightly and precise as you can.
- You can even decorate your planes with colors, glitters, etc.
- Remember! Never throw paper airplanes in the class until and unless they are part of what your class activity. You might get into problem. So, avoid doing this at school.
- You can also experiment with paper to create your own paper airplane.


