In this article, we will discuss how to clean a Keurig? Cleaning a Keurig is quite a simple and easy process. There are numerous ways to clean it. One of the methods is to give your Keurig a general cleaning using soap and dish detergent. One should perform it regularly. Another method include the use of vinegar. This method can be performed two to four times in a year. It mainly depends on how often you use your coffee machine. These methods will not only keep your Keurig clean, but also increase the efficiency and durability of it. It’s an excellent way to keep your coffee delicious. Below are the methods to clean a Keurig. Follow them properly to keep your machine and coffee perfect.
A.) Method 1: General Steps to Clean a Keurig
1.) Dismantle Parts to Clean a Keurig
Steps to Follow:
- Dismantle your coffee brewer. Open the cover of your Keurig by pulling the handle and detach the K-Cup holder inside.
- To detach the K-Cup holder, fold the top of the holder with one hand. And, with your other hand, push up the bottom of the K-cup assembly from below. The assembly will eventually release.
- Be careful while removing the K-Cup holder. This is because; there are two sharp needles present inside which can hurt you if you disconnect the assembly inappropriately.
- The other pieces are relatively easy to disassemble. Pull the funnel gently until it dislodge from the K-Cup holder. Now, remove the drip tray simply by pulling it away from the base of the brewer.
2.) Washing to Clean a Keurig
Steps to Follow:
- Start cleaning the K-Cup holder first and then funnel, drip tray and drip plate. All these elements are dishwasher-safe. So, you can simply keep them in the top rack of your dishwasher. Just run the machine on a normal wash setting with some mild dish detergent.
- Now, to wash the K-Cup holder, wash it under warm to hot running water. You don’t need extra scrubbing or detergent for normal cleaning. But take extra precaution to prevent yourself from getting pierced by the sharp needle present inside the holder.
- If you want, you can also rinse the funnel, drip tray, and drip plate by hand. Soak all these pieces in some hot soapy water and scrub them gently using a non-abrasive cloth. Wash them well to remove all soap residues.
- Finally, dry all the pieces well. Either you can let them to air dry for a few hours, or you can dry them manually using a clean dish towel or paper towels.
3.) Clean the Exit Needle of K-Cup Holder to Clean a Keurig
Steps to Follow:
There are exit needles with three holes on the inside bottom and upper portions of the K-Cup holder. Get rid of any debris or dirt from these holes by inserting a paper clip into each one of them. Shake and move it around the holes to loosen and remove anything clogged inside. This is important because coffee ground and cocoa mix get lodged easily in these exit needles.
4.) Clean the Removable Lid and Water Reservoir
Steps to Follow:
- These parts of the Keurig are not dishwasher-safe and should be cleaned by hand with clean water and a non-abrasive cloth.
- Do not use cleansers or detergents on these parts.
- Wiped out these elements thoroughly with a wet cloth. Wash under warm to hot running water.
- Dry them properly by letting the components to dry naturally. You can also dry them using a clean dish towel or paper towel.
5.) Wipe the Outer Part to Clean a Keurig
Steps to Follow:
- Using a damp and non-abrasive cloth or rag, wipe away any stains or coffee grounds spots on the outer part of the machine.
- You can also go for a soapy cloth for a more methodically cleaning. Just remember to wash the soap residue from the machine.
- NOTE: Never dip the entire brewer in water.
6.) Reassemble your Brewer
Steps to Follow:
- Fit the funnel back into the K-Cup, and put the K-Cup back into the brewer.
- Fit the arrows on the bottom and top of the K-Cup. Do everything thoroughly and carefully without leaving any parts behind.
B.) Method 2: Vinegar Soak Method to Clean a Keurig
1.) Vinegar Wash to Clean a Keurig
Steps to Follow:
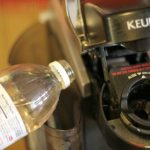
- Fill the water reservoir with pure vinegar. Now, brew the vinegar through the Keurig.
- This process is called descaling and is suggested to do it every 3 to 6 months. Descaling will help removes excess grime sticking inside the brewer.
- Keep a ceramic mug on the drip tray to trap the vinegar which flows through the brewer.
- Never use K-Cup while doing the vinegar wash.
- Discard the warm and dispensed vinegar by disposing it to the sink.
2.) Second Vinegar Wash to Clean a Keurig
Steps to Follow:
- Repeat the initial vinegar wash process, but let the vinegar to sit for some time to descale the machine more thoroughly.
- Now, keep the same ceramic mug (used in the first step) on the drip tray.
- Again, do not use K-Cup.
- If you are using a mini model of Keurig, lower the brewer handle 5 seconds after pouring 300 ml of vinegar to the reservoir. Press the Brewing button, and power the machine down as it starts to dispense the vinegar. Let the remaining vinegar to sit in the machine for half an hour before powering it back again to complete the brewing cycle. Discard the vinegar by dumping it in the sink.
- In case of standard-size model, add 1500 ml of white vinegar to the reservoir and brew as usual. When it displays “Add Water”, pause the process and let the vinegar sit in the brewer for 4 hours while the machine is still working. Dispose the remaining vinegar later.
3.) Fresh Water Wash to Clean a Keurig
Steps to Follow:
- Pour some clean water through a brewing cycle to get rid of any vinegar residue.
- Remember to keep a ceramic mug in the drip tray to trap any dispensed water.
- Please remember that you don’t add K-Cup to the machine.
- Now, pour some fresh, cold water to the reservoir. For mini models, use 300ml of water. For standard models, use 1500ml of water.
- Press the brewing button and let the brew cycle to run normally. Get rid of hot brewed water by dumping it down the sink.
- Continue with the cold water wash process up to three or more times to remove any left out vinegar taste.


