In this article, we will discuss how to clean Keurig. Either you love it or hate it, pod coffee system has got a status in the market of morning beverage. If you are having a Keurig coffee machine, you must be aware how important it is to keep it without issue every day.
However, coffee machines getting a lot of daily use can get clogs which can cause the Keurig to stop completely. In order to prevent this situation, you should clean Keurig periodically. Timely cleaning and proper maintenance will help you keep your keurig function efficiently. Below is a quick cleaning solution to keep your Keurig trouble-free.
Things You Need to Clean Keurig:
- White vinegar (You can also use a Keurig Descaling Solution)
- Paper Towels
- Kitchen towel or microfiber cloth
- Paper clip
- Tooth brush
- Dish washing liquid
- All-purpose cleaner
- Water
- Drinking straw
A.) Method 1 to Clean Keurig
1.) Cleaning of Removable Parts to Clean Keurig
Cleaning Removal Parts:
- Unplug your Keurig: First and foremost thing you need to remember is that never clean or detach the parts of your Keurig when it’s plugged in. And, ensure that you are working in a well-lit space which is clutter free.
- Remove the Water Reservoir and Lid: You can notice some instructions under lid about how to clean the lid using damp cloth and also the reservoir is dishwasher safe. When disassembling the water reservoir, ensure that you don’t misplace any parts, especially the O-ring. Otherwise your Keurig will leak next time you use it.
- Detach the K-cup Holder and Funnel: When removing the K-cup holder and funnel, be careful of the sharp needles present in there.
- You can also remove drip tray and drip tray cover if you feel like cleaning them.
Most of these parts are safe for dishwashing, but it is suggested to add the items only and not the entire machine to sink. Add the pieces to the warm soapy water and let them sit for 10 to 15 minutes, wash and dry them using a towel.
NOTE: As dishwashers can be harsh on plastic items, so it is suggested to never scrub the reservoir. You can clean it with just a gentle wipe using a soft cloth.
2.) Clean K-Cup Area using a Toothbrush to Clean Keurig
Using a toothbrush, get rid of small coffee grounds that are stuck in and around the K-Cup holder area. Simply scrape it in and around the area where you see any dirt or debris.
3.) Clean K-Cup Area using a Paper Clip to Clean Keurig
To clean the holes that pierce the K-Cup, you use a paper clip by gently pushing it inside. These holes get clogged easily with coffee and mineral accumulation. You may need to wiggle the paper clip a bit inside the holes. In case a paper clip does not fit, you can find something smaller item.
You can also turn the Keurig machine upside down to give it a “gentle tap” on the bottom. This will help dislodge anything which could be stuck inside.
NOTE: The water line might get block at this point at the time of the descaling procedure. So, be aware of it. If this happens, you can simply shake the paper clip inside. Assemble the machine back together and finish the descaling procedure. Don’t be afraid about breaking anything inside these holes, as there are no such parts which can break inside.
4.) Clean Water Line using a Straw to Clean Keurig
In this step, you need to spot the water line spout and you need to connect a straw to it. You may need to use your fingers to seal it. Now, blow air through this straw. This will loosen any debris present inside the water line to fall. You may need to blow extremely hard. If you can’t do this, you can skip this step.
5.) All-Purpose Cleaner to Clean Keurig
To clean the outer part of the machine, you can use a microfiber cloth and all-purpose cleaner. It is suggested to spray the cleaner on to the cloth rather than directly on the Keurig. This is done in order to prevent cleaner from getting in unwanted spaces.
6.) Wash Water Reservoir & Mesh to Clean Keurig
In this step, you need to dislodge the water reservoir and need to empty it. Remove the water filter as well if your machine has one. Now, run the tap water full stream and let it run over the mesh filter inside. This will clear it from any debris present in it.
- You may see white scaling, especially on the reservoir area. You can clean this using white vinegar. It is suggested to use a paper towel soaked with vinegar to wipe the area.
- You can also soak the area for a minute to let the vinegar get deeper before you wipe it with a damp cloth and water.
B.) Method 2: Descaling to Clean Keurig
Descaling brewer is a process in which mineral buildup such as limescale are removed from the machine. You’ve may have seen a hard white substance getting build up in coffee machines from time to time. This can happen quite frequently if your tap water has a high level of minerals.
Tap water is known to have a large amount of such minerals and is often termed as hard water. After a certain period, this buildup clogs the line or may break off in tiny pieces. This is generally the reason behind the water reservoir and feeding line failing to function properly in a Keurig.
NOTE: It is not necessary to clean your Keurig before starting the descaling process. However, it may be useful as it will ease the descaling process and help remove as much buildup as possible through the entire brewer.
Steps for Descaling Process to Clean Keurig:
- Assemble your Keurig brewer back like you are ready to brew a fresh cup of coffee. Make sure that all the parts are fixed and fitted properly. And, remember to fix the reservoir O-ring.
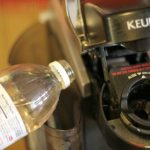
- Now, load the water reservoir with a sufficient amount of white vinegar. You can fill it about half way to make vinegar water.
- Now, run a brewing cycle. This will make the vinegar solution hot.
- Get rid of the hot vinegar after the cycle completes.
- Keep on brewing and disposing the vinegar until the reservoir is completely empty.
- Now, refill the reservoir with water.
- Then, brew hot water and dispose until the reservoir is entirely empty. This is done to get rid of all the vinegar from the machine.
- Congrats! You’re ready to make a fresh cup of coffee in your clean Keurig again!

